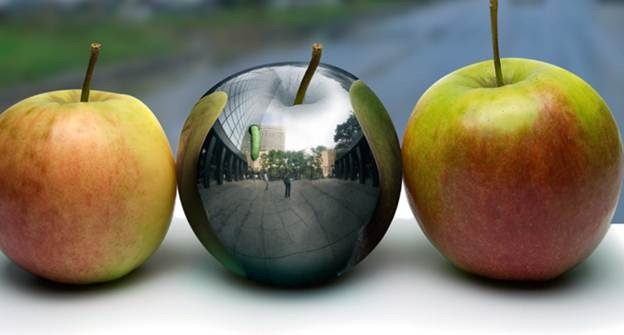
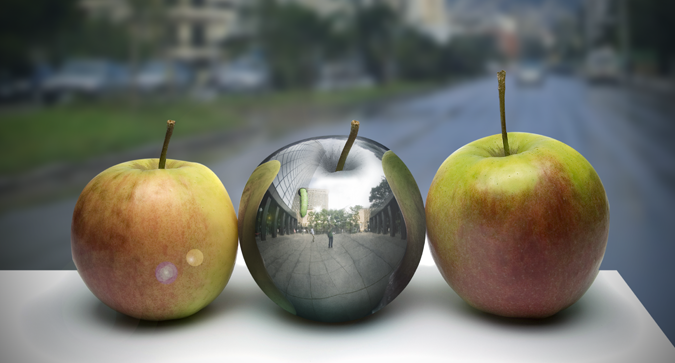
In this Tutorial we will learn how to create a metallic apple with reflections. This tutorial
will show you how to warp objects, dodge/burn, and add reflections to
metal to Create a Photo Realistic Metal Apple in Photoshop.

The following are the things needed for the tutorial:
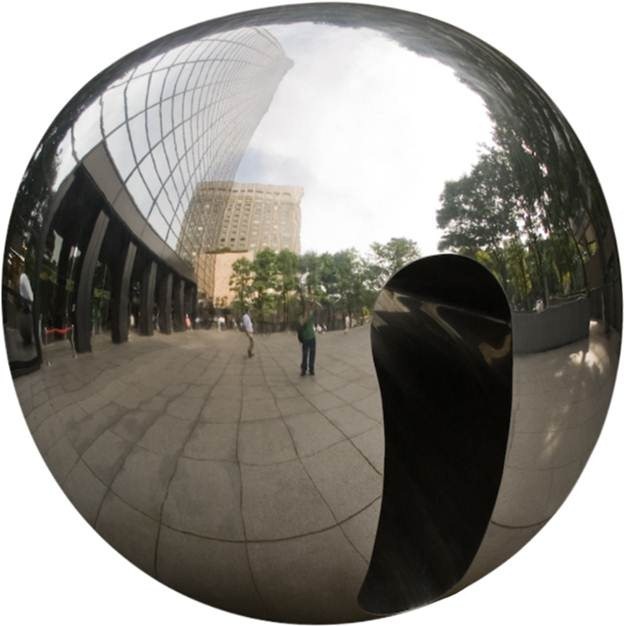
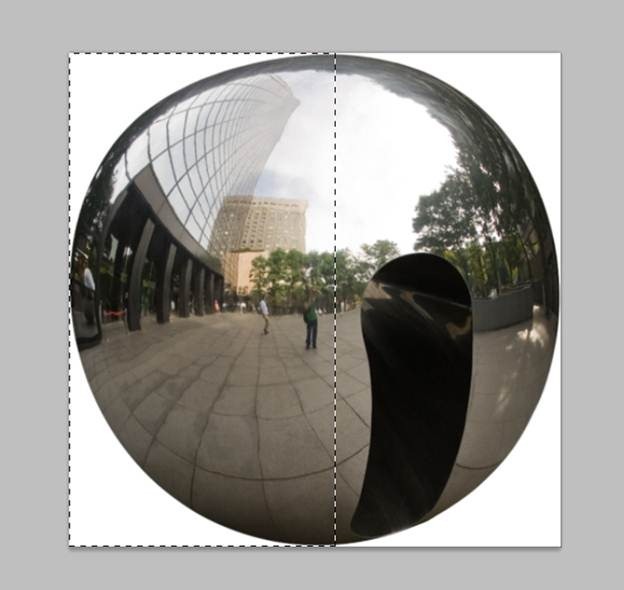
Let’s begin by selecting the Rectangular Marquee Tool and make a selection of the left half of the ball.
Make sure that you are on the original ball layer and Ctrl-click on it to make a selection. Press Ctrl + Shift + C to Copy Merged (copy all visible pixels, not only the ones on the layer we currently are).



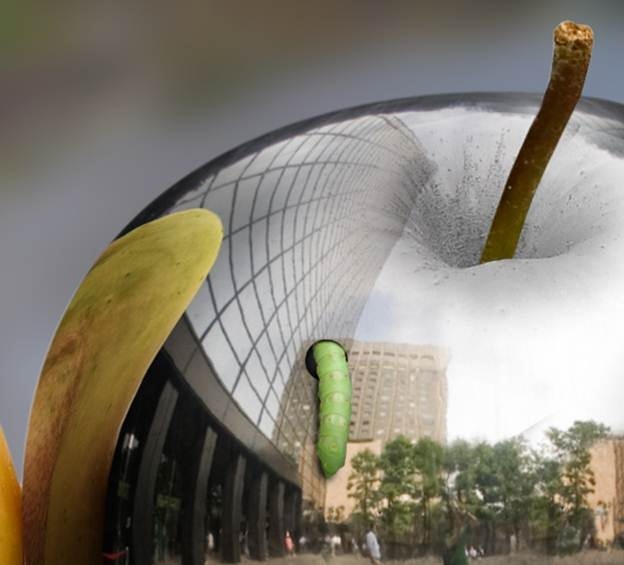
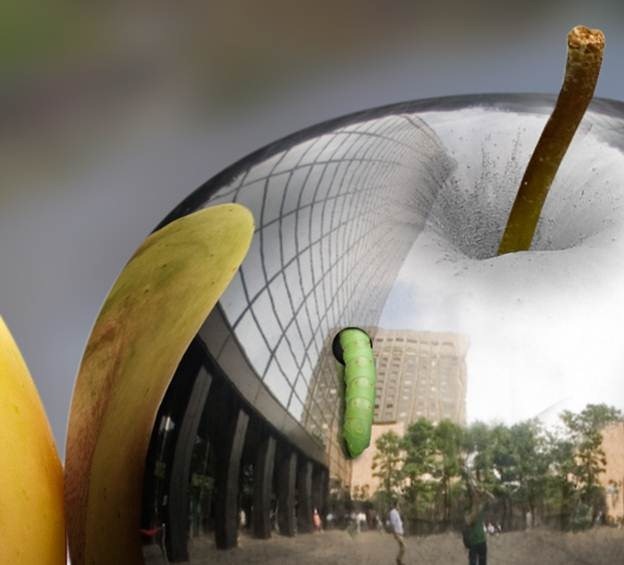
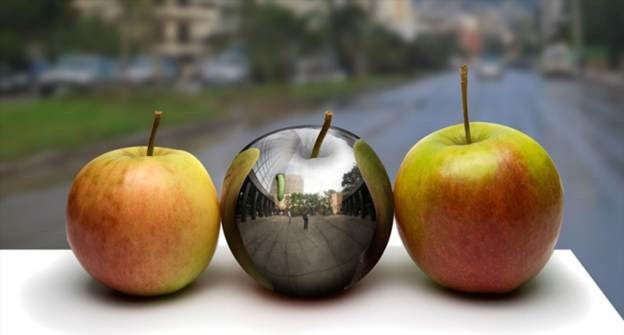

The following are the things needed for the tutorial:
Step 1
Open file “Metal Ball”. Select the Elliptical Marquee Tool and make a selection of the ball. Hold shift while dragging to keep the selection a perfect circle. After you’ve selected the ball press Ctrl + C to copy and Ctrl + N to create a new document. Photoshop it’s smart enough to calculate the dimensions of the selection and input those variables into document creation window so all you have to do it’s to press Ok. Paste the image (Ctrl + V).
Step 2
Now we have the ball selected into a new document and the reason for this it is that the door in the middle of the ball kind of ruins the whole aspect of it. We need a nice, round metallic ball and this is the only decent image of a chrome ball I could find, except it has an ugly entrance of some sort that’s ruining its symmetry. Notice that the door it’s mainly in the right half of the image while the left half looks good. The solution to this it is to use the good half to correct the bad one. This technique I am about to use it’s useful when you are retouching or correcting symmetrical objects and it also works great on human faces.Let’s begin by selecting the Rectangular Marquee Tool and make a selection of the left half of the ball.

Step 3
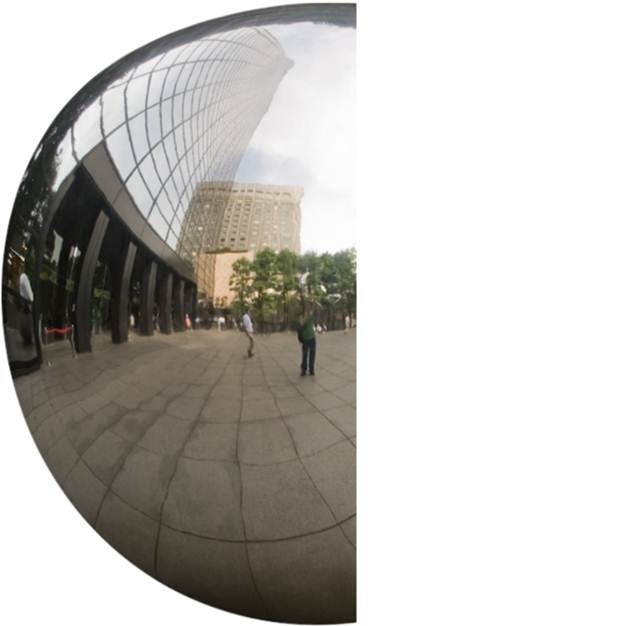
Click on the ball layer to select it and press Ctrl + J to copy the selection on a new layer. I turned of the visibility of the ball layer temporarily so you can see the half ball layer.
Step 4
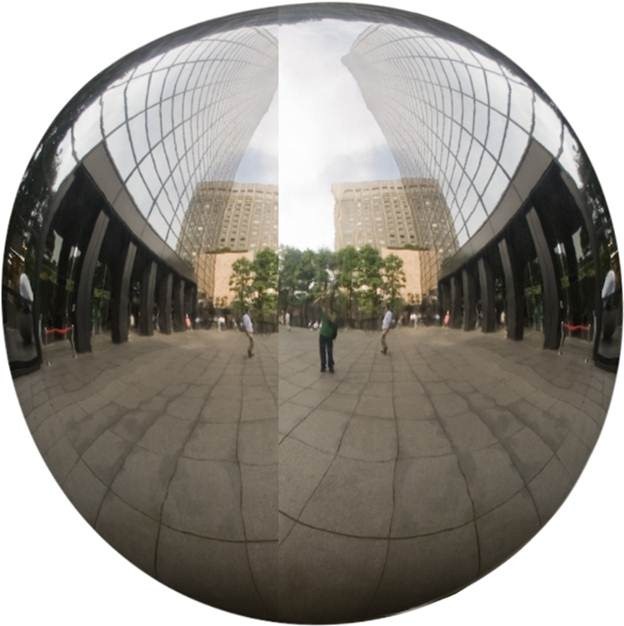
While on the half ball layer press Ctrl + T to enter Free Transform. Right-click and choose Flip Horizontally. Hold Shift and drag the half ball to the right to position over the original right half.
Step 5
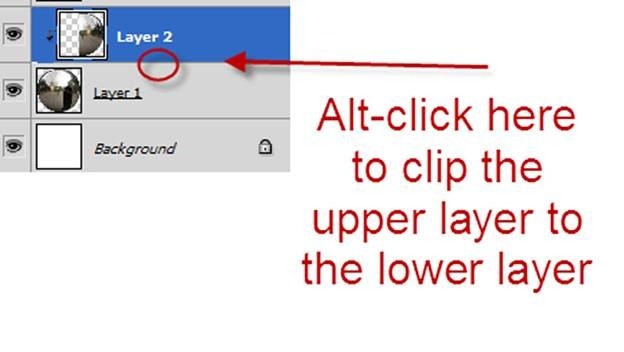
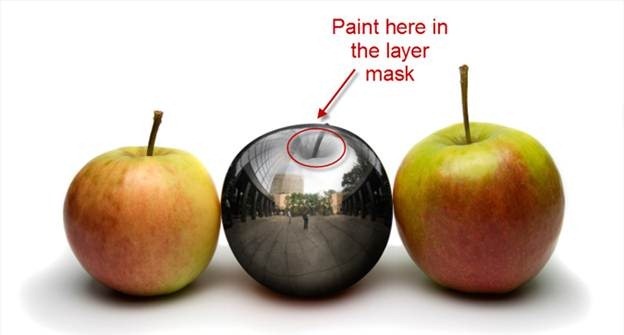
Add a layer mask to the half ball layer (Layer > Layer Mask > Reveal All) and Alt-click between the half ball and the original ball layer in the Layer palette to clip the upper half ball layer to the lower original ball layer. This means that the half ball layer will be visible only through visible pixels below, so if you did not placed the half of the ball exactly over the right half of the ball in step 4 you don’t need to worry about it now.
Step 6
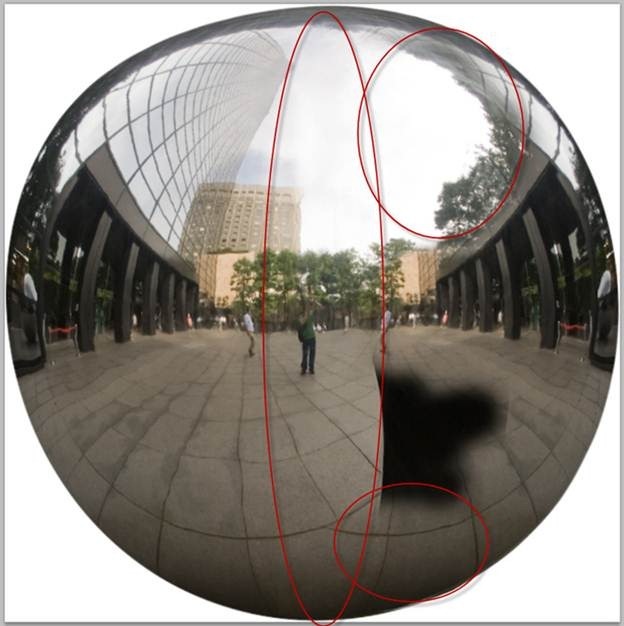
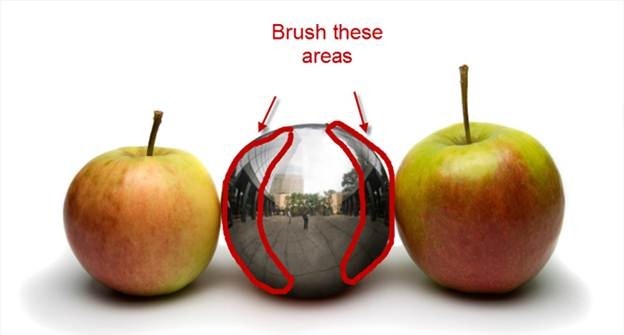
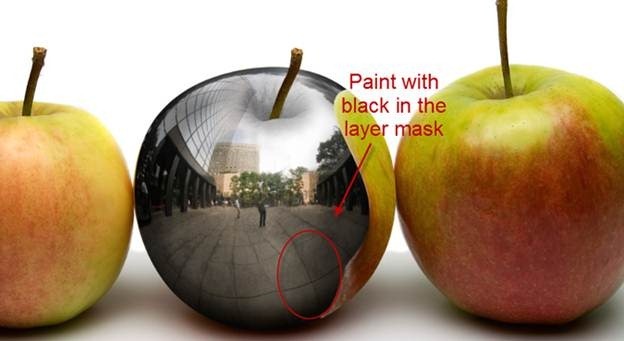
Selecta soft round Brush Tool at a decent size (100px) an paint with black in the layer mask to hide the areas encircled below.
Step 7
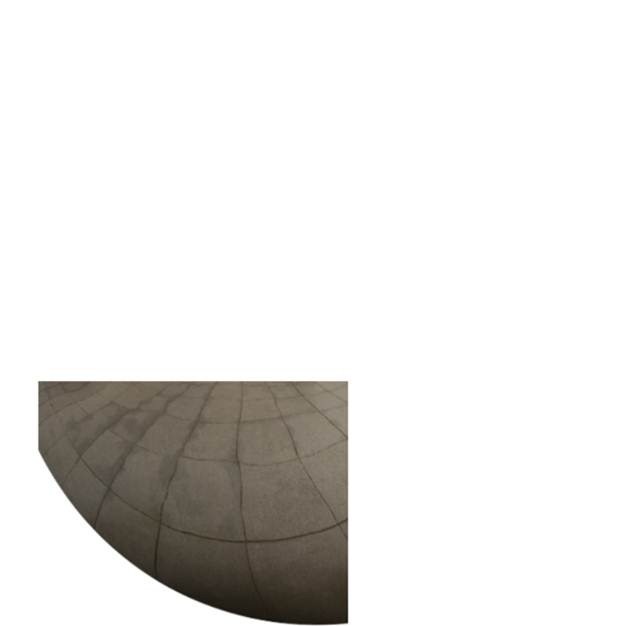
To get rid of the ugly black spot in the middle and to make the ground look right we will repeat the trick from step 2. Let’s make a selection of some ground that looks good on the right side and make press Ctrl + C to make a copy of selected area (before you press Ctrl + C turn off the visibility of the white Background layer an make sure that you have selected the ball layer in the Layer palette). Create a new layer on top of all layers (Layer > New > Layer) and press Ctrl + V to paste it.
Step 8
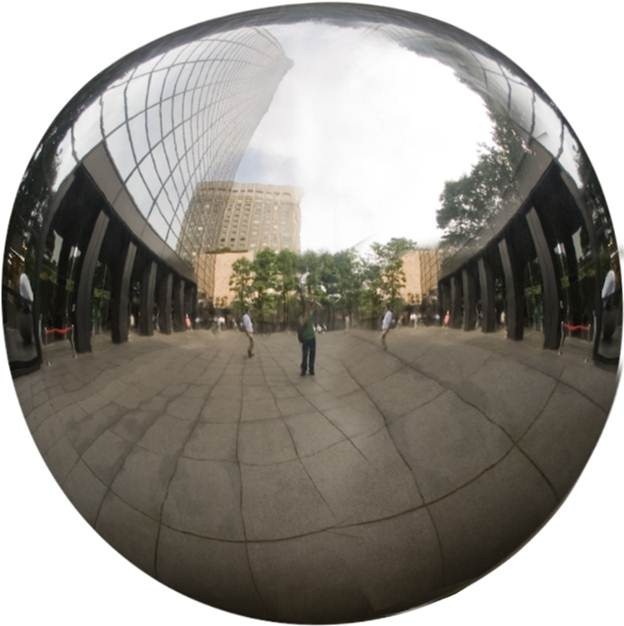
Now it is only a matter of placing this layer on the right side and using Free Transform and warp to make it fit. Add a layer mask to this layer (Layer > Layer Mask > Reveal All) and using a round soft black brush tool paint over the obvious edges. You should have something like the image below.
Step 9
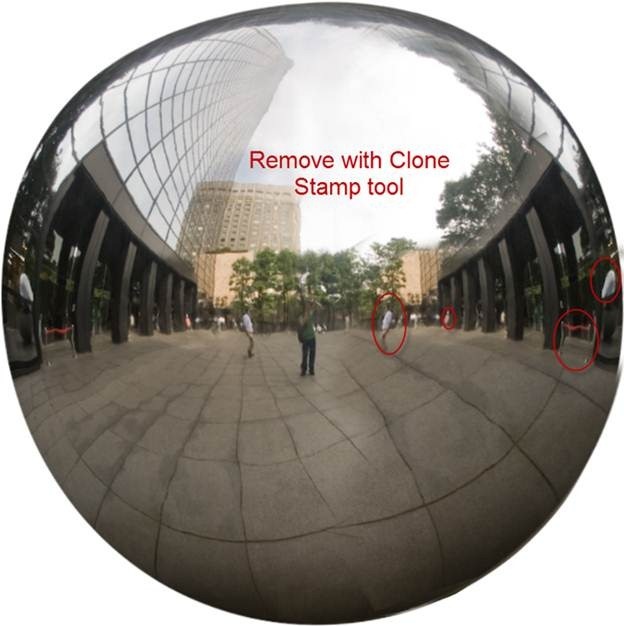
It starts to look good but there are still a few elements that need correction. First there are some elements that repeat themselves (like the guy in white or the red cordon). Create a new layer (Layer > New > Layer) and use the Clone Stamp tool to remove the indicated spots. There are some additional glitches where the lines in the ground unite but I think the ball it’s looking pretty good as it is so I won’t spend any more time correcting it.Make sure that you are on the original ball layer and Ctrl-click on it to make a selection. Press Ctrl + Shift + C to Copy Merged (copy all visible pixels, not only the ones on the layer we currently are).

Step 10
Open the image “Apples” and press Ctrl + V to paste it. Name this layer “Metal Apple”. Make sure you save the image so in case your computer crashes your work will be safe.
Step 11
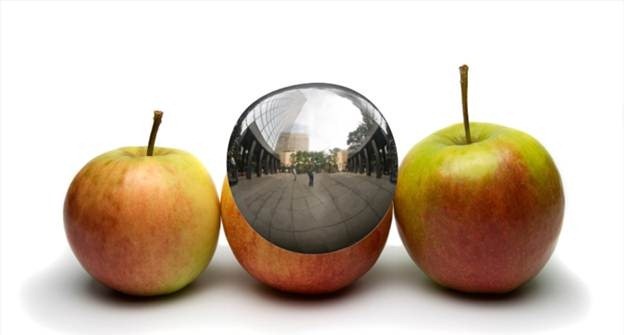
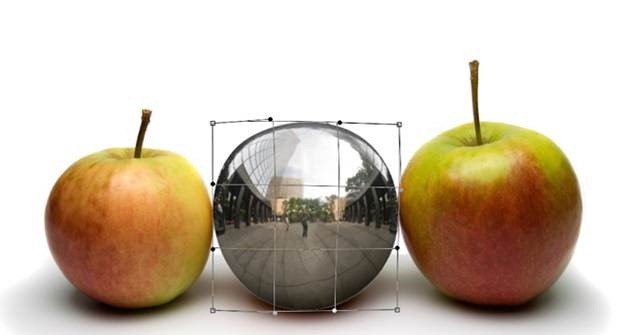
Use Free Transform (Ctrl + T) and warp to fit the ball exactly over the middle apple. Don’t worry about the protruding stem (the little stick that connects the apple to the tree).
Step 12
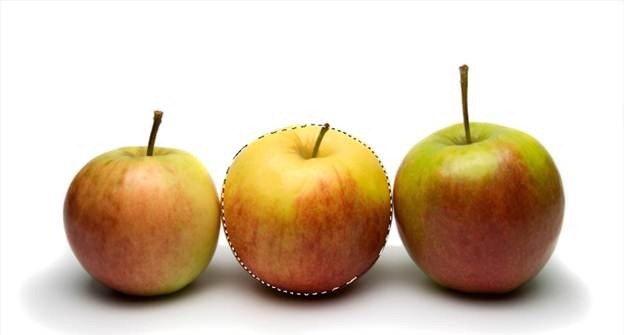
To make it look more realistic we need some texture from the original apple. Turn off the visibility of the metal ball layer and using the Pen Tool make a selection of the middle apple.
Step 13
Press Ctrl + Shift + C to copy merged and Ctrl + V to paste the selection on a new layer. Because we only need the texture and not the colors desaturate the layer by pressing Ctrl + Shift + U. Change the layer blend mode to Overlay and lower the opacity to 40%. Move this layer on top and clip it to “Metal Ball” layer.
Step 14
Create a new layer above all layers (Ctrl + Shift + N) and clip it to the layer below (the texture layer). Select a round soft brush tool and set it’s Opacity to 40%. Paint gently the edges of the metal ball. Change the layer blend mode to Multiply and further lower the opacity to around 60%. This step will add a bit of shading to the metal ball – I will call it metal apple from now on.
Step 15
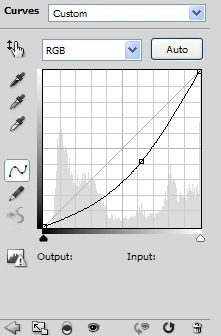
To further add some shading and get rid of the flat look of our metal ball let’s add Curves Adjustment Layer above all layers and clip it to the layer below. Drag the curve downwards to darken.
Step 16
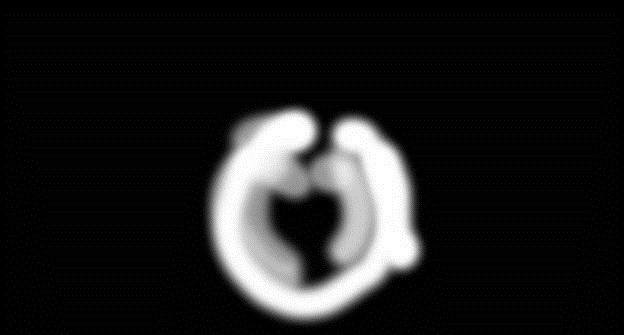
Click on the Curves layer mask and press Ctrl + I to invert the colors thus filling the mask with black. Now select a round soft brush and paint again at the edges of the metal apple to give it some 3D look. Take a look at my layer mask below for reference.
Step 17
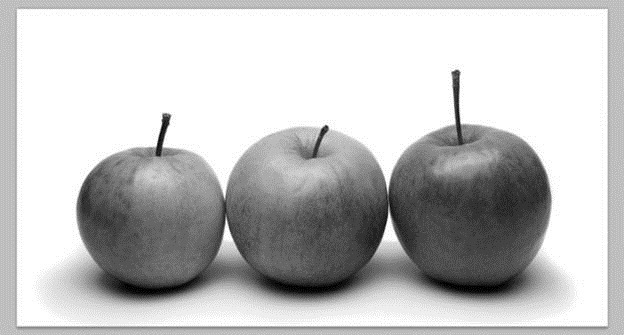
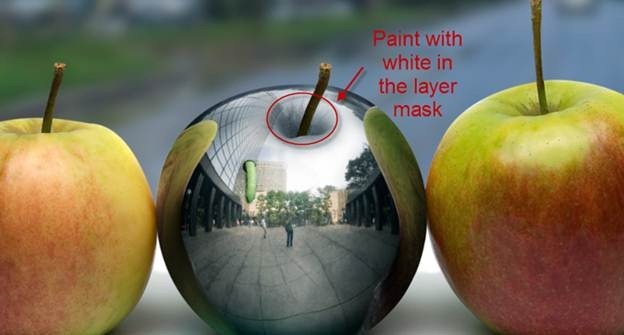
Now let’s make the little depressed area where the steam connects to the apple. In order to do this click on the background layer (the original one with three apples) and press Ctrl + J to duplicate. Move this layer on top of all layers (a handy shortcut for doing this fast is Ctrl + Shift + ]) and desaturate (Ctrl + Shift + U).
Step 18
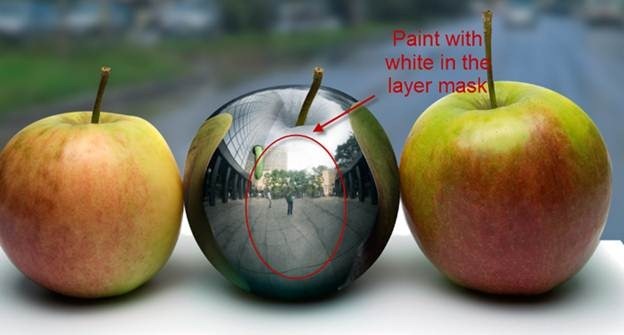
Change the blend mode of the layer you duplicated in step 17 to Multiply. Add a layer mask (Layer > Layer Mask > Reveal All) and fill it with black (press D to set default colors and Ctrl + Backspace to fill with Background Color). With a round soft brush at 100% Opacity paint with white in the layer mask to reveal the depressed area.
Step 19
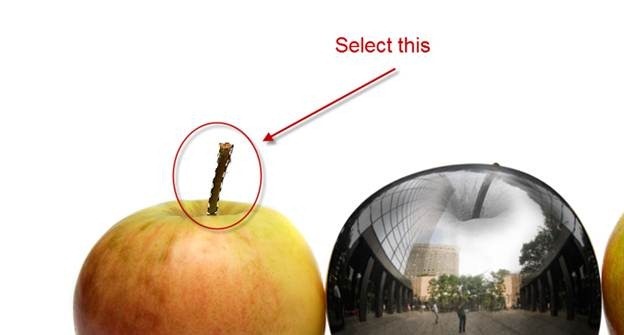
We will need a steam for the apple and I decided to use the one from the left apple. The reason for that is that the steam from the middle apple it’s too short and thin and it won’t look good. So go ahead and make a selection of the stem from the left apple using the Pen Tool or your favorite selection tool (to make a selection with the Pen Tool first create your path than press Ctrl + Enter to transform that path into a selection).
Step 20
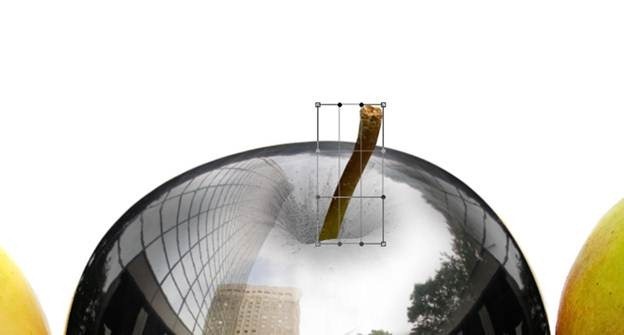
Press Ctrl + Shift + C to copy merged and Ctrl + V to paste. Move the newly created layer above all layers and use the Free Transform to position it on the middle apple. You can also use the Warp tool to make look a bit different from the stem on the left apple.
Step 21
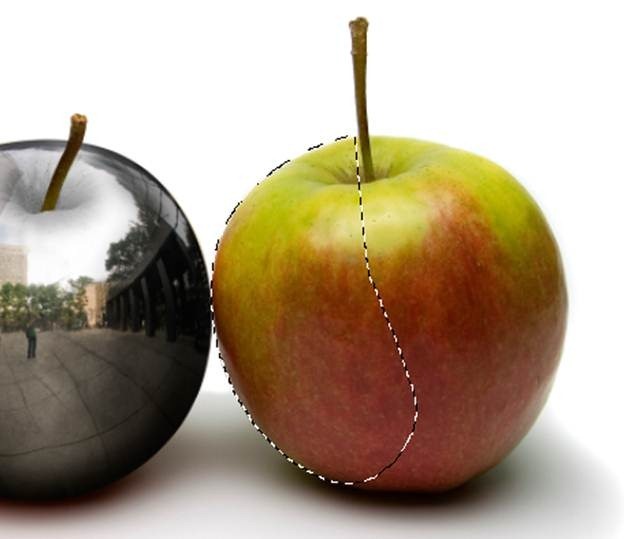
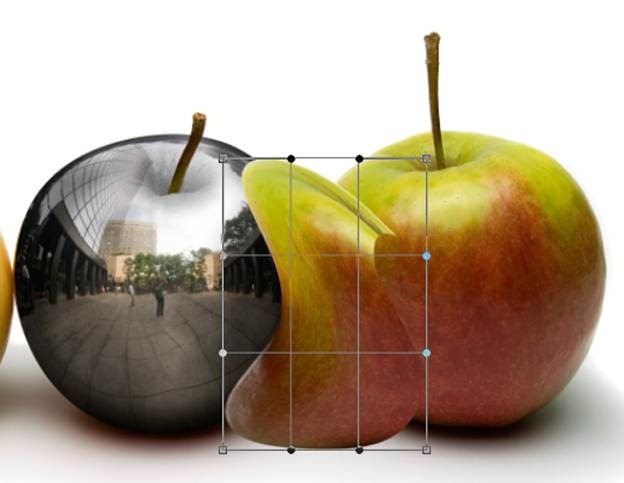
Now for the tricky part. Because this is a metal ball it should also reflect the apples on the left and right. In order to create this reflection use the Pen Tool to create a selection of the left half of the right apple.
Step 22
Press Ctrl + Shift + C to copy merged and Ctrl + V to paste . Now use the Free Transform tool and warp to position and tweak the appearance of the half apple to make it look proper on the metal apple.
Step 23
Add a layer mask to this twisted half apple by choosing Layer > Layer Mask > Reveal All and fill the mask with black (click on it than press D to set default color and Ctrl + Backspace to fill with background color) and notice how all the pixels disappear. But we want to get rid only of the pixels outside the metal apple so what do we do? Well, we Ctrl-click on the metal apple to load it as a selection and then we click back in the layer mask. With white as foreground color press Alt + Backspace to fill the selection with white and thus reveal pixels only inside the metal apple. Looks good but I am not very happy about the way the bottom part looks so select a round soft brush and paint with black to hide the bad spot.
Step 24
It looks a bit light so let’s add a clip Curves Adjustment Layer mask to it. Drag the curve downwards to darken. Also, add a Hue/Saturation Adjustment layer and clip it to the previous Curves layer. Drag the Saturation slider to -50. We do these steps because this is supposed to be a reflection so it should be less colored and light than the original.
Step 25
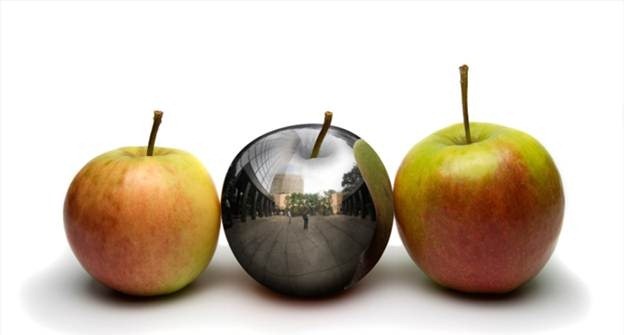
Add yet another clipped Curves Adjustment layer and drag the curve downwards to darken. Fill the layer mask with black and paint with a white soft brush at the edges of the apple to darken. Your image should look like the one in the image below.
Step 26
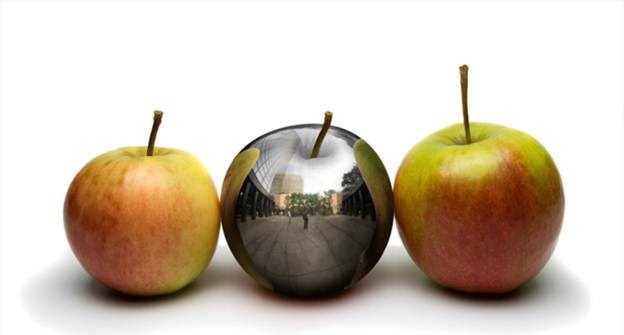
Repeat steps 21 to 25 for the left reflection.
Step 27
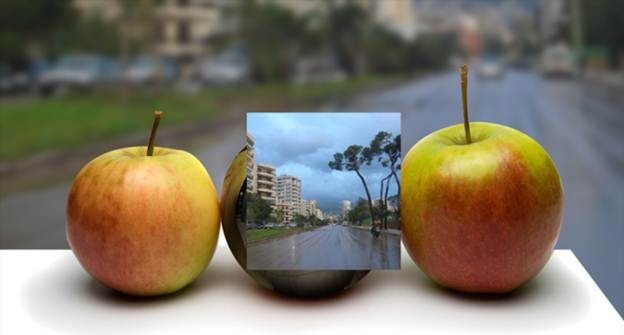
It looks pretty good now so let’s start adding the details. Notice that a city is reflected in the metallic apple but the apples are placed in a white background. That’s not too good. Let’s add some city background. Open file “City” and press Ctrl + A to select all and Ctrl + C to copy. Paste it in our document (Ctrl +V).
Step 28
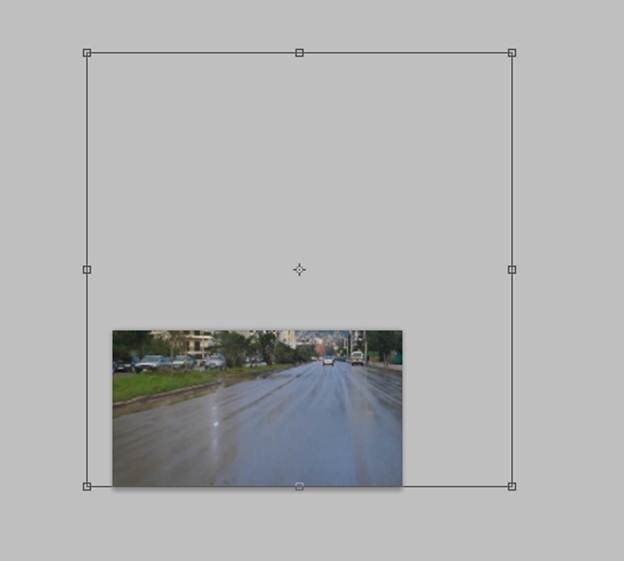
Press Ctrl + T to Free Transform and make this layer bigger by holding Shift and dragging from the corners so only the left bottom half of the image will be visible.
Step 29
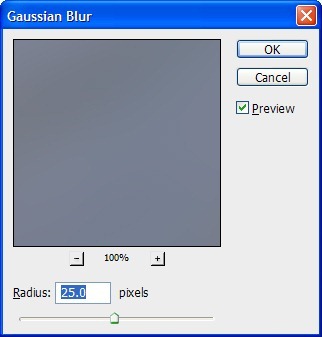
Apply a 25px Gaussian Blur to the city layer (Filter > Blur > Gaussian Blur) so it won’t distract us from the main element – the metal apple.
Step 30
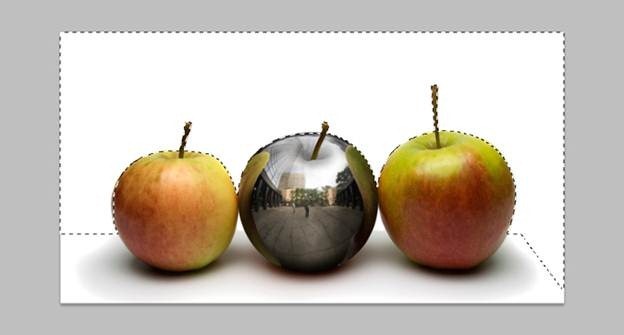
Turn off the visibility of the city layer and using the pen tool carefully make a selection like the one shown below. After that feather the selection by choosing Select > Modify > Feather and entering 2px in the dialog box.
Step 31
Turn the visibility of the city layer back on and add a layer mask by choosing Layer > Layer Mask > Reveal All. Press D to set default colors and press Ctrl + Backspace to fill with black, Ctrl + D to deselect and Ctrl + I to invert. You should have the city placed nicely behind the apples and in the process we also made something that resembles a corner (in the right of the image).
Step 32
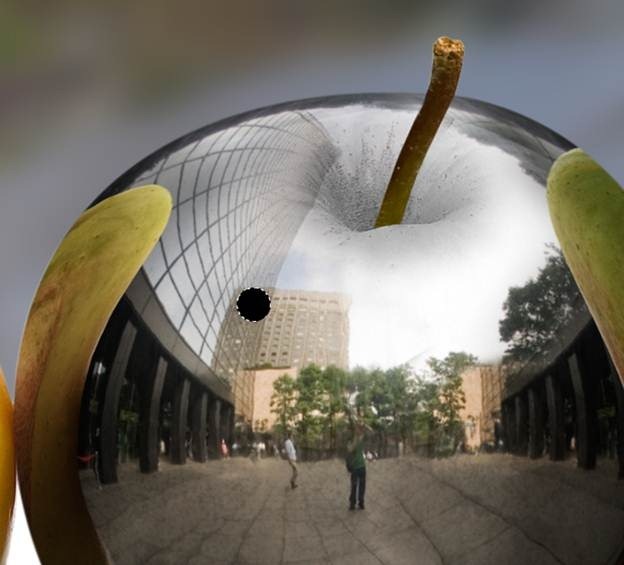
To add some realism to our scene let’s add an apple worm to the metallic apple. First let’s make the hole. Select the Elliptical Marquee Tool and Hold shift while dragging to make a perfect circle. Create a new layer (Ctrl + Shift + Alt + N) and fill this selection with any color you want (press Alt + Backspace).
Step 33
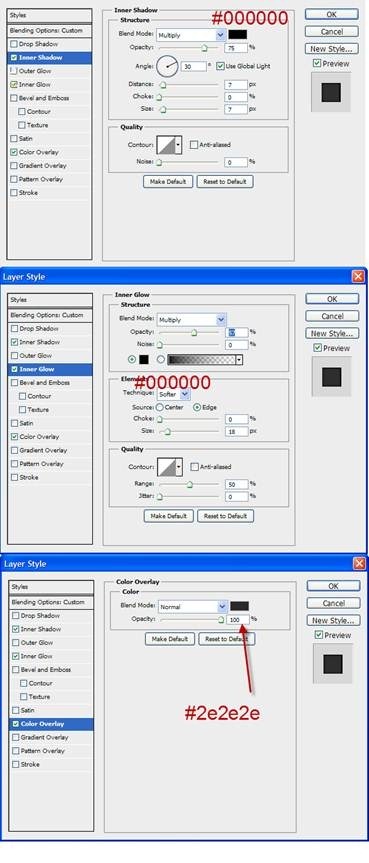
Double-click this layer you just created and drag the Fill slider all the way to the left. Add some Inner Shadow, Inner Glow and Color Overlay.
Step 34
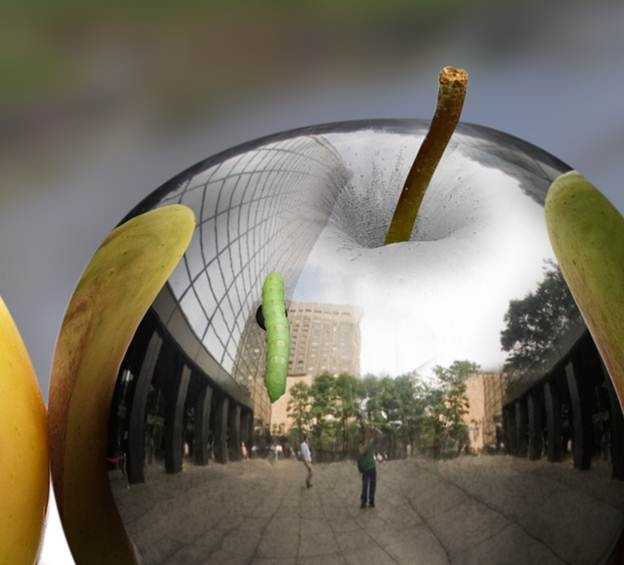
Open file “Worm” and using the Quick Selection tool make a selection of the worm. Press Ctrl + C to copy and Ctrl + V to paste it in our document. Use Free Transform (Ctrl + T) to resize and place the worm like shown below (just over the hole).
Step 35
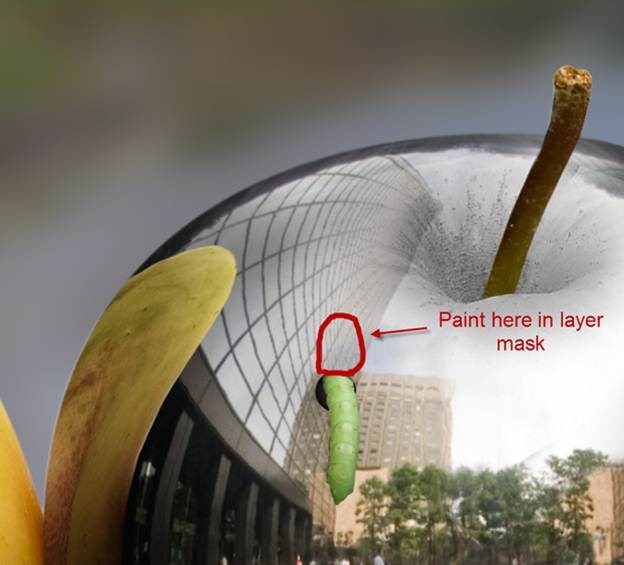
Add a layer mask to the worm layer by choosing Layer > Layer Mask > Reveal All. Select a round soft brush and paint with black in the layer mask the upper part of the worm to give the illusion that the worm is crawling into the hole.
Step 36
Let’s create some shadow below our worm. Create a new layer (Ctrl + Shift +Alt + N) and place it just below the worm layer. Choose a round soft brush and paint carefully with black to create a shadow. Change the layer blend mode to Multiply and lower the opacity to around 80%.
Step 37
For even a further dose of realism I decided to also add a worm reflection on our metal apple. To do this simple click on the worm layer and press Ctrl + J to make a duplicate. Put this layer below the shadow layer and lower its Opacity to 64%. Press V to select the Move tool and drag the worm a little bit to the left. It is barely visible but it’s important for the realism of the whole scene.
Step 38
It’s time for the final adjustments. Let’s take a look at what we accomplished so far. The composition looks good; however I find the image a bit too reddish for my taste. We will correct that in the next step.
Step 39
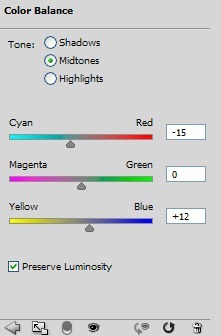
Add a Color Balance Adjustment layer and decrease the red amount while increasing the blue.
Step 40
Take a look at the shadow below the metallic apple. Notice that it has the a dark red hue. That’s natural because it was the shadow of a red apple. But now it is the shadow of a metallic apple and it should have more cool color. In order to adjust that add a Color Balance Adjustment layer and drag the Cyan-Red slider to the left (-34). Fill the layer mask with black (you should know how to do that by now) and with a round soft brush paint with white over the shadow area (paint in the layer mask). Now we should a have a proper shadow below the metallic apple.
Step 41
To further increase the 3D look of the apple let’s add some light in the middle of it. Create a Curves Adjustment layer and drag the curve upwards to lighten. Fill the layer mask with black and with a round soft brush paint with white the center area of the apple in the layer mask.
Step 42
Remember the depressed area from step 17? I think it looks too faded so let’s increase its darkness. Add a Curves Adjustment layer and drag the curve downward to darken. Fill the layer mask with black and paint with white in the layer mask to reveal the effects of the Curves only in the area indicated below.
Step 43
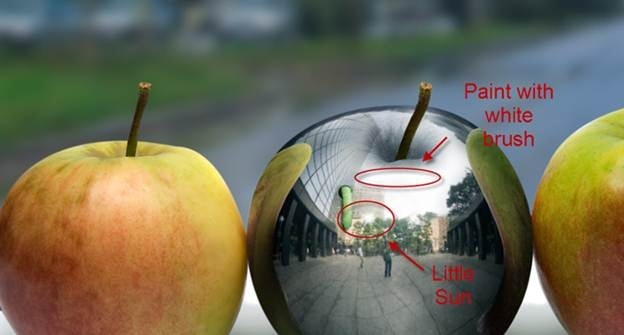
Let’s add a bit of sparkle to this metallic apple. Create a new layer and use the Preset Manager to import the “Sun Brushes”. Create a white little sun somewhere on the upper part of the apple. After that select a round soft brush and paint with white just above the sun.
Step 44
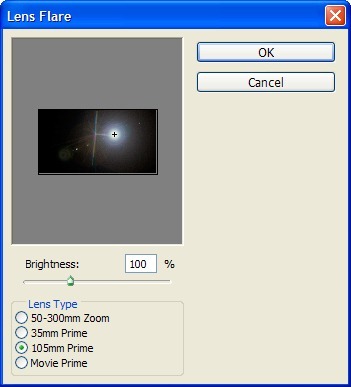
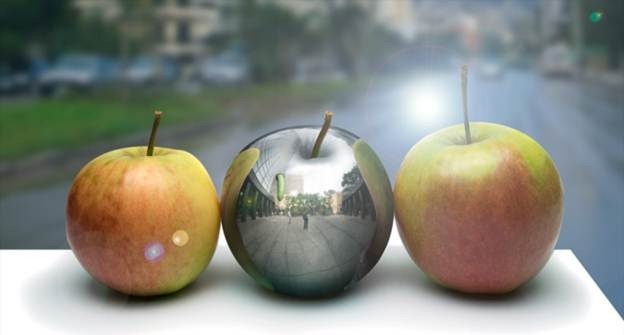
Let’s add some lens flare to make the scene even better. In order to do that create a new layer (Ctrl + Shift + Alt + N) and fill it with black (D to set default colors and Alt + Backspace to fill with foreground color. Now choose Filter > Render > Lens Flare. Select 105mm Prime and click ok.
Step 45
Change the blend mode of the lens flare layer to screen to get rid of the black pixels and lower the opacity to 73%.
Step 46
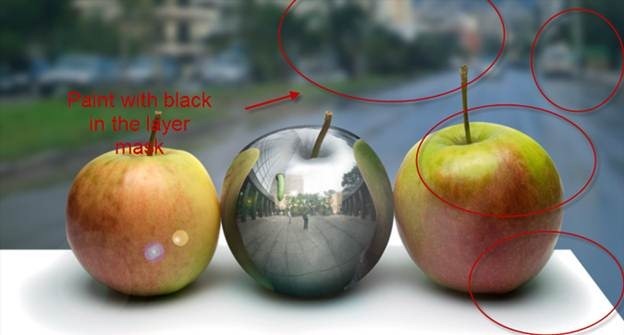
Add a layer mask to the lens flare layer (Layer > Layer Mask > Reveal All) an select a round soft brush. In the layer mask paint with black to get rid of the sun.
Step 47
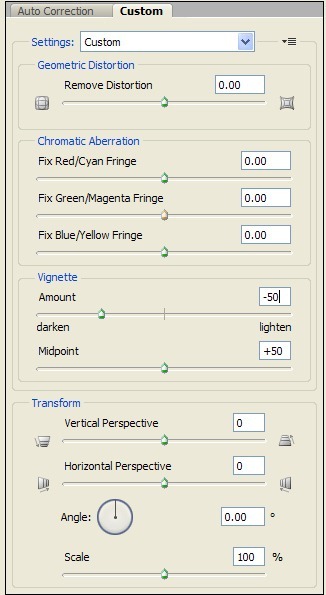
As a final step let’s apply a Vignette to make the middle of our scene the point of interest. Make a layer from all visible layers by pressing Ctrl + Shift + Alt + E and choose Filter > Lens Correction. Click on the Custom tab and drag the Vignette slider to -50. Now take a step back and admire your work. Looks pretty good, huh?
Final Results

Comments
Post a Comment